Capturing the Beauty of Germany’s High-Speed Rail

Germany’s high-speed rail network is one of the most efficient and modern in the world, connecting major cities such as Berlin and Munich in a matter of hours. For photographers, this means the opportunity to capture stunning landscapes, unique architecture, and exciting people along the way. In this guide, we’ll explore how to make the most of your high-speed rail journey through Germany, with tips and recommendations for capturing the beauty of this transportation mode. 

Germany’s high-speed rail network, operated by Deutsche Bahn, covers more than 1,300 miles and reaches speeds of up to 186 miles per hour. The network connects major cities such as Berlin, Hamburg, Frankfurt, and Munich, offering a comfortable and convenient way to travel between them.

Choosing the Right Train and Route

To make the most out of your high-speed rail photography experience, it’s essential to choose the appropriate train and route. Things like time of day, weather conditions and the appeal of the landscape along the path should all be taken into account when making your decision. For example, the ICE trains between Berlin and Munich offer stunning countryside views, while the routes through Frankfurt and Cologne offer urban landscapes and impressive architecture.

Photography Tips for High-Speed Rail Travel

When photographing from a moving train, it’s important to stabilize your camera or use a fast shutter speed to avoid motion blur. Consider shooting in manual mode to adjust your settings for the changing light conditions along the route. Use a wide-angle lens to capture the expansive landscapes and architecture, and look for interesting foreground elements to add depth to your images.

Recommended Photography Spots Along the Route

Some of the most scenic and interesting photography spots along the high-speed rail route from Berlin to Munich include the Elbe River Valley, the Thuringian Forest, and the historic city of Nuremberg. Each location offers unique opportunities for capturing the beauty of Germany’s high-speed rail network.

Germany’s high-speed rail network offers photographers a unique perspective on the country’s landscapes, architecture, and people. By choosing the right train and route, using photography techniques suited to moving subjects, and exploring recommended photography spots, you can capture stunning images that showcase the beauty of this modern transportation mode.

Why You Should Print Your Own Photos?

Printing photos


The recent purchase of a limited edition photo book by Scottish photographer Bruce Percy made me realize that I needed to delve a little more into the possibilities of printing my photos myself.

Just like my own photos, I know Bruce’s photos mainly digitally (I do have a few photo books and canvases), but on paper, the photos take on a whole new dimension. Many photographers only consider a photo to be a photo when it is printed.

Lately, I have read a lot about the possibility of printing my own photos. It immediately became clear that it was not simply buying a printer like the Brother DCP t510w, ink, and some paper to get good prints. There are quite a few settings and variables to take into account, so that what you see on the monitor also rolls out of the printer.

Reflect before you begin

First of all, it should be said that if you do not plan to make regular prints, then it is probably not a good idea to buy your own printer, ink, and paper. The cost price per print will probably be much too high, specialized printers can help you better.

Printers are built to make regular prints, if it is stationary for a longer period of time, the print head can become clogged by drying up the ink. The quality of the printer (more expensive) and storage location can help prevent this hiding.

For myself, I have accepted that the prints will be slightly more expensive, but I want to master the art of printing, so that I can exercise full control over the end result, get better prints and also share the acquired knowledge with you again.

In this article I assume ‘fine prints’, prints that you want to hang on the wall and print on high-quality paper, it is not about achieving the same result of a 10x15cm photo at a printing center.

Quality

The quality of the print is determined by a number of factors. First of all, by the photo itself. This must of course be sharp, the sharper the better because when printing, some sharpness is always lost.

Ideally, you photograph from a tripod or with a high shutter speed and, if present, image stabilization of the lens. When post-processing, you also apply more sharpening for a photo that you print than for a photo that you view on a monitor.

When printing photos, the number of megapixels can play a major role, partly depending on how large you want to make the final print. The more megapixels, the larger the print can become or the higher the resolution is with a smaller print.

But as many people have also discovered, too many megapixels are not good for the image quality of the photo itself. The more pixels that are crammed onto a sensor, the greater the chance of noise if you choose higher ISO values. It is therefore a compromise. For a print on A4, a 6 to a 7-megapixel camera is often enough (partly depending on the dpi, pixels per inch, that you set).

Ink

An important element in the choice of a photo printer is ink. Innovations are constantly taking place here, new inks are becoming increasingly color-like, covering even better and ensuring that the printer can produce more and more colors.

In recent years there has been a revolution in the development of so-called pigment inks. These generally last much longer than traditional inks. The ink also dries faster (important if many different colors are mixed) and the ink can withstand water better. The pigment ink does lose some color intensity because it bites deeper into the paper, but developments do not stand still.

The colors that the printer makes are composed of the colors cyan (blue), magenta (lilac / light purple), and yellow, often combined with different inks for black and gray tones and often also a black variant for glossy and one for matte. Some printers also have a cartridge for green. For example, it can happen that you sometimes install 6-8 different cartridges with a printer. In general, the more cartridges you have, the more color-like the colors.

The cost of ink is a hot topic, if you have to put 6-8 cartridges in a printer it can just happen that you spend € 200-250 for a full set. This sometimes corresponds to 1/3rd of the price of the printer itself. The larger the cartridges, the more points you can get out of them, but also the higher the cost price is if you replace the cartridges.

In many cases, the printer has loose ink for matte and glossy, but only one print head is available for this. If you switch between these two variants, the printer will first have to spray the print head clean, so the ink is lost if you change regularly. Smart thinking about the order of printing different photos and edits can therefore save a lot of ink.

For many people, this can lead to them being frantic about printing and wanting to waste as little ink as possible. It is of course good to want to save money, but the question is whether you should invest in your own printer. In general, being willing to invest money also leads to better results.

Paper

When discussing printers, the cost per print is often stated based on how quickly the cartridges empty. But the choice of paper often plays an even greater role in the cost price and quality of the final print. The choice of paper can be very personal and change depending on the desired end result.

The thickness of the paper (note that your printer can handle the thickness), the texture, high gloss or matte, and durability all play a role and affect the price per sheet. For standard high gloss 50 sheets A4 it could be that you pay € 30, but if you go for museum quality A3 fiber paper then 25 sheets could just cost € 100-150.

It’s easy to get lost in the great papers available at first, if you’re just starting to print, experiment with the cheaper ‘OEM’ papers available first. You can also be sure that a print profile (see next chapter) is available for your printer and that the printer and the paperwork are well together.


ALSO READ: 8 Reasons To Start Photography As Your Hobby


Profiles

Whether you look at a photo on a screen or on paper is a world of difference. On a monitor, the photo is exposed from behind on paper. This leads to a print looking much darker on paper than on a monitor. In addition, the color 100, 100, 100 means something different for your computer than for your printer. It is therefore important to correct this image in such a way that what you see on the monitor also appears on the print.

This can be done with color profiles. When printing you have to deal with different profiles, your camera, your monitor, the printer, and the paper all have their own interpretation of color.

Monitor profile

For the post-processing of your photos and preparation for printing, it is important that you have a calibrated monitor. In principle, almost every monitor is adjusted to the sRGB color profile, but how the colors are displayed can still differ per monitor. The red on one monitor is not the red on the other monitor. For editing photos that is not an ideal situation, as a photographer we want everyone to see the colors as we intended them.

To ensure that the color red, green, or blue that you see on your monitor is also seen on other monitors, you can use a color meter that can create a correct sRGB profile for your monitor. For example, the Pantone Huey, Spyder3 series, or the meters mentioned in the next chapter (which combine monitor and printer meter). Then you know for sure that the colors you see are correct.

Of course, it depends on whether the receiver /viewer of the photo has also done this for her / his monitor.

Print profile

Once you have edited the photo as you want, the printer profile comes into play. This profile translates the colors you see on your monitor into the colors the printer produces. This profile partly depends on the ink and paper you use, with each variant colors can be displayed slightly differently.

Colormunki PhotoThere is several methods to get a color profile. If you use a printer and paper from a brand such as Canon, Epson, or HP, you can often download the color profile for the type of paper from the manufacturer’s website. Independent paper producers often also post profiles on their websites for specific printer and paper combinations.

Make sure you use exactly the profile for the type of paper you use, a small deviation in the text (Premium or Ultra Premium) can make a big difference because it can be a completely different paper composition.

If you do not have access to a standard profile or do not like it, there are a number of options to get a profile. You can use a spectrophotometer such as an X-Rite ColorMunki Photo or Datacolor Spyder3 Studio. These scans the colors of a test print that you make with the printer and the desired paper and create a profile based on this.

Such a spectrophotometer is quite expensive (around € 380-400 online) and it takes time to create a profile, if you use a few different papers then it may be an option to send a print to a specialized lab that creates a profile for you.

Soft-proofing

Once you have created the profile, you can take the printout. However, each print costs ink and paper. To avoid having to make many prints before you have the final desired view, you can use ‘soft-proofing’ in Photoshop, Lightroom, and Aperture, among others. This gives you an indication on your screen of what the final print will look like.

It is important that you set up your monitor as you had to do when creating the monitor profile (often less bright than in normal use) so as not to make the image too light and to make the colors and contrast look more like the final print.

Print

After you have created a profile when printing from your photo editing application, you choose the desired profile, in theory, those colors should now come close to the image on the monitor, with the caveat of course that the photo on the monitor is exposed from behind is always displayed slightly differently on a print.

Do not look at the print next to your monitor, but rate it in full daylight or use lamps or a lightbox (expensive, but worth it if you make a lot of prints that you sell to customers) that approach a daylight color temperature.

It’s a good idea to start with paper from the manufacturer itself in the first place. The advantage is that the drivers and profiles for those papers are already available, so you have to spend less time on calibration and you are also pretty sure that those papers will do well with your printer. If you do not like the paper or you want to use other types of paper, you have already gained some experience with printing and good comparison material.

Don’t be distracted by the first impression immediately after printing. Depending on the chosen paper and printer, it can take several hours to a day before you see the real colors on the paper, the difference can sometimes be quite dramatic.

I hope that in this article you have got a good impression of what is involved in printing. Based on these experiences, I will further elaborate on the topics in this introduction article in detailed articles. Do you print all your own photos, what are your experiences?


The Importance of SEO for Your Website

It’s hard to believe that the head of a company’s digital presence has never heard of SEO for search engine optimization. The benefits of SEO in your business are almost unlimited, and efficient and effective use of SEO can help you succeed in a crowded market.

You probably covered the basics of SEO and how it works. People are becoming more dependent on technology as they browse the web, even for their most basic needs. Therefore, it is important to adapt your marketing strategy to changing market conditions. You can use SEO to make your website at the top of your search results page. This is essential for business growth. Many companies use SEO to promote their websites and if you need one too, you can visit contractor marketing agency.


The Importance of SEO for Your Website

One important way to market your business on the Internet is SEO (Search Engine Optimization). You can use SEO to quickly increase your website’s traffic and improve your ranking on the Search Engine Results Page (SERP) for specific keywords. What do you mean? The explanation is simple.
Many potential customers search the Internet for products and services they need or are interested in using search engines, especially Google. For this reason, Google’s home page is the most obvious place to market your brand and attract new customers.
But, there is no one-size-fits-all solution to keeping your website top of Google’s search results. Search engine algorithms continue to change, and competition is getting better and better, so you need to stay up to date and optimize your website.

The main benefits of SEO for growing your business

To survive the era of Internet-based services, every company needs an online presence. A robust online presence can bring many benefits to your business. Currently, almost all search queries are run through search engines on the Internet. There is no doubt that most purchase decisions are made on the fly by the end-user.
Therefore, if you want to grow and reach your business, you need to use your digital marketing approach and strategy to get your target market. This is where the importance of SEO in digital marketing deserves. You need to cautious when deciding how to promote your business online.

Below are some of the main benefits of SEO:

Increased potential customers in your business
After all, no matter how well your company is organized and managed, your customers are important. Profit is the lifeblood of all businesses.
SEO-optimized websites rank your business at the top when your buyers search for relevant keywords. As a result, potential consumers are more likely to visit and browse your site before making a purchase decision. This regularly creates potential consumers for your company.

Tips and Tricks for PC Gamers

Whether you’re switching from the console or trying out your game for the first time, buying a new gaming PC is always exciting. With each passing year, the gaming industry is getting bigger and bigger, with lots of great games to try and lots of communities to participate in.
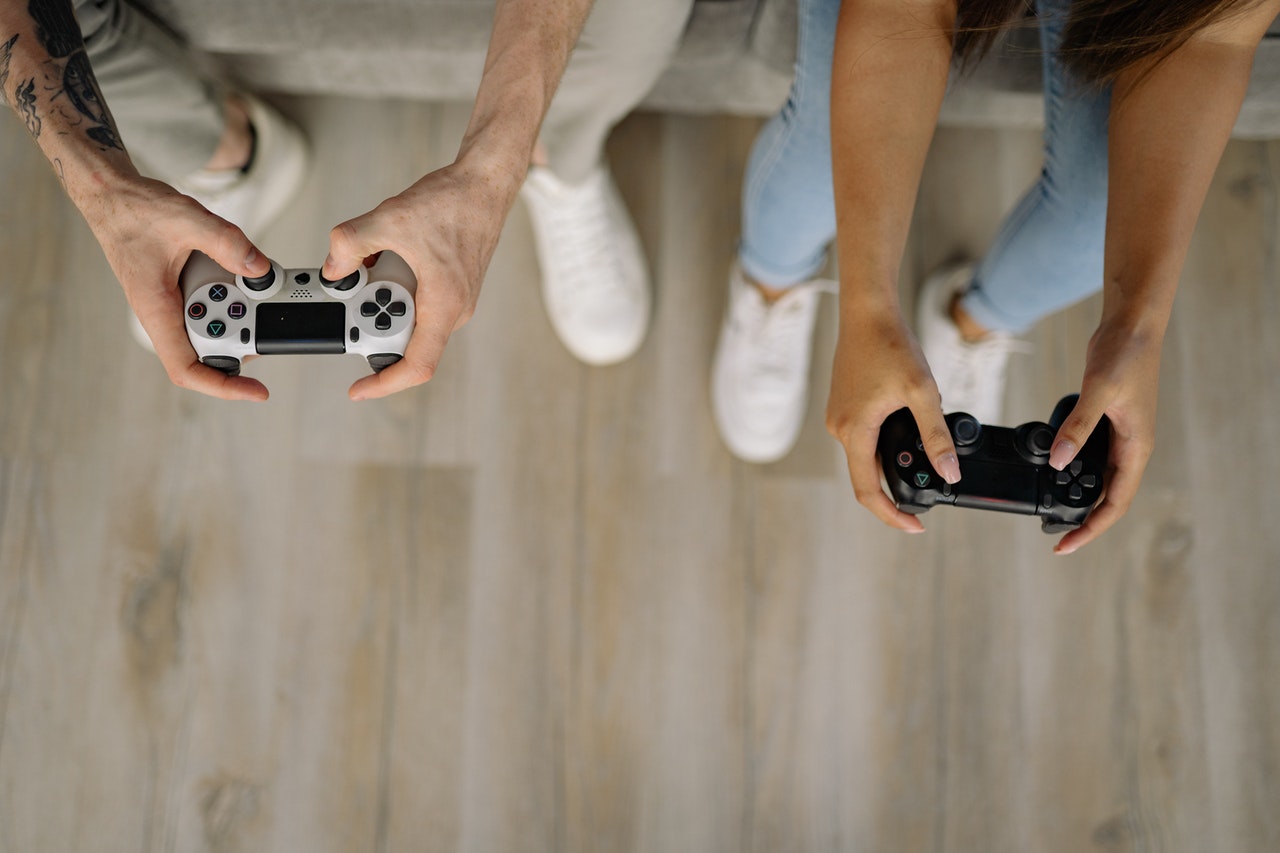
As a new gamer, this all may seem a bit overwhelming, but once you understand the gaming community and the PC, there’s a lot of fun. We’ve provided tips and tricks to help new PC gamers get the most out of their games in this article. 

Getting the right accessories

 Spend a lot of money on CPU machines and displays. It is fair to combine them with the highest quality accessories. Playing games with the same regular mouse, keyboard and headphones will not give you a complete experience.

Invest in these accessories and get a Razer gaming mouse, keyboard, and headset with additional features. If you’re not good at playing with a mouse or keyboard, don’t worry. You can always choose the widely used Xbox Live controller for Windows.

Check Out Some Gaming Tips and Tricks Online

From DOTA to Grand Theft Auto V, you’ll find all the popular games online, and you no longer have to go to the store and buy those DVDs. You can easily buy games online and download them directly to your PC. 

Aside from buying your games online, the web has a lot of sites that can provide you with some tips and tricks. An example of that is Pillar Gaming. One of the guides it offers is for Lotr Rise To War PC. Visit the site to learn more about new tricks and your character’s powers. 

Comfort is important

No matter how disciplined you are, playing games on your PC is highly addictive and allows you to sit in the same place for hours. It’s fun to play exciting games that are nailed to your seat, but it’s also essential to be comfortable around you.

First, make sure you have a comfortable chair that provides proper back and hip support. Next, prepare a height-adjustable desk that suits you. Also, get safety goggles to avoid damaging your eyes.

Keep Your PC Clean 

Some people are careless about their gaming PCs and never clean them. As a result, their PCs are very easily damaged and need to be removed several times for repair. It is highly recommended to clean your PC regularly to prevent it from getting dirty. It’s so easy that you can even use a hairdryer to get rid of dust. 

8 Reasons To Start Photography As Your Hobby

Photographer


It is often said that the most effective way to preserve a memory is in a photograph. The human mind can forget, and places change. However, photographs have some way of taking us back to the very moment an image was taken. Taking on photography as a hobby is one of the foremost inspiring, fulfilling, and relaxing ideas for anyone curious about this manner of art. The most effective part is that you simply don’t need the foremost expensive equipment to urge started.

If you’re inquisitive about photography but undecided whether it’s for you or should try other things from this list of hobbies, here are reasons that make it a good hobby.

1. Photography is often a stress buster

While it should start sort of a simple hobby where you are taking random shots together with your phone, photography could be a relaxing activity that may be wont to relieve stress. When taking photos, the camera could be a fantastic way of constructing your present within the moment. This enables you to determine nature with all its beauty, which is therapeutic. That specialize in your creative side is a perfect way of helping your mind relax.

When taking photos for yourself, you’re ready to enjoy the wonders that include this hobby. Once you learn to use the skill therapeutically, you’ll be able to consider going into photography as a money-making hobby.

2. Great for creating memories

Taking photos is a wonderful way of constructing memories. Learning a way to use a camera to capture different situations may be powerful. You’ll use this hobby to document different times in your life, the environment around you, or a flash.

For making memories only photos don’t seem to be enough, attempt to record the moments which carry an enormous value for you. This process is enjoyable and also the quality of the video is going to be higher once you use a professional-grade video camera.

When you keep a record of an occurrence through photographs, you’ll be able to share them within the future along with your family or friends as digital pictures or permanent physical hard copies. Photographs are the most effective way to capture and retain memories.

3. Photography helps to specify a vision and tells a story

They say an image is worth 1000 words. As a variety of art, you’ll use photography to specific your views, ideas, and beliefs. You’ll be able to also use it to inform a story of a couple of communities or a personal. You’ll take up differing kinds of photography as a type of expression. Many artists use their art to deal with different issues affecting their societies and life as how of reaching resolute people through their art. You’ll be able to use photography to tap into a difficulty you’re smitten by when you’ve got fun.


ALSO READ: 3 Tips for Taking Great Photos of Guitars


4. It helps connect with the planet and stay within the moment

Since the arrival of social media platforms like Instagram, Snapchat, and Facebook, it’s become possible to use photography as some way of connecting with the planet. Specific social media groups for photographers may be great places to find out and share for beginners. This ability to share your gift with the planet is motivation enough to require up this hobby.

5. Encourages trip new places

Once you begin taking photos, you may be inclined to jaunt new places in your locality or maybe globally as you hunt for picture-perfect locations to shoot. Including landscapes, people, places, and wildlife, there are many interesting things to photograph. If you’ve got been considering traveling, photography gives you lots of reasons to try to do so.

Traveling is a tremendous learning opportunity that exposes you to different ideas and ideas which will be available in handy for your new hobby. It gives you room to explore your creative side as you are attempting different photography ideas and skills, helping to grow your hobby.

6. It is fun

Holding a camera in your hand and capturing pictures is one of the foremost fun activities you’ll take up. Once you learn the proper way to take pictures, you may love documenting every passing moment. You’ll take random pictures wherever you go, stalk wildlife, hike the very best mountains, take stunning pictures of the view, or just photograph your loved ones on a random day at the beach or out. There is many fun stuff you can do together with your camera.

7. It helps to boost other areas of your life

Photography is quite just holding a camera to require pictures. The more you develop your skill, the more open-minded you become, which might go an extended way in helping your social and communication skills. It becomes your escape for your weekends or once you get bored. This ensures your mind is usually engaged and always searching for opportunities to enjoy nature. If you furthermore may add the creative industry, photography as a hobby will enhance the way to design your products or approach your job.

8. Photography is often paired with many other hobbies

The best thing about photography is that it’s a hobby you’ll be able to take anywhere with you. If you’ve got other hobbies that take you to different places, you’ll be able to use these opportunities to require eye-catching pieces of your friends of the environment around you. Whether it’s a hiking expedition or a weekend out with friends, you’ll take photos that will immortalize these moments.

If you’ve got been dancing around the idea of absorbing photography, these benefits are enough to urge you to start. Photography can add value to your life because it allows you to show ordinary day-to-day moments into special memories you may enjoy looking back on.


3 Tips for Taking Great Photos of Guitars

Guitar Photography


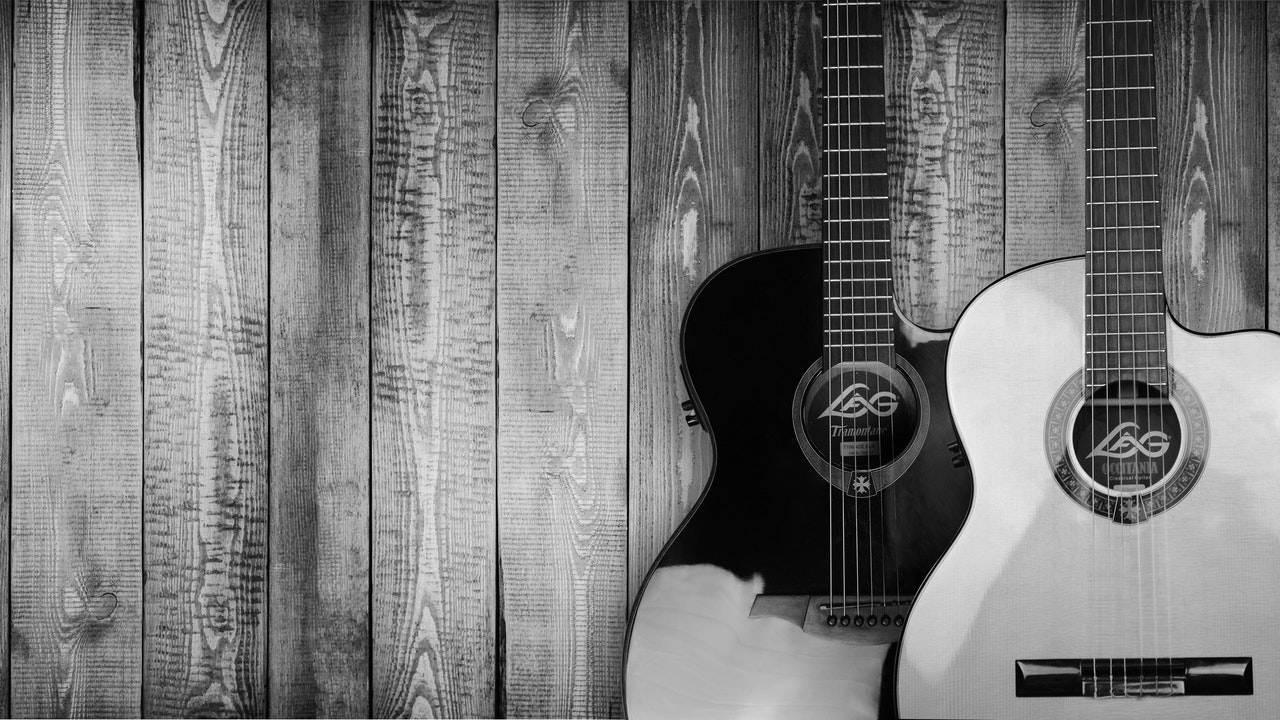
For musically minded individuals, guitars are over just a way to play songs like Oh My God Tabs & Chords – they’re an object of pride meant to be displayed prominently in their interior. “Good pictures are really important”, Alexander tells us. “Especially in online auctions as you can’t view the guitar face to face before you buy it.”

1. Limit reflections

A glossy finish and chrome elements could also be easy on the eyes, but when you’re trying to capture a guitar on camera, they will pose a true challenge. Both natural light and artificial light are accustomed to positioning the guitar in a very thanks to avoiding any reasonable reflection that will distort the image.

Natural light is best – just ensure it’s not too sunny and bright. And while your camera’s flash option could appear straightforward thanks to getting some extra light into your photo, avoid it in the least time, as you’re likely to finish up within the picture yourself.


ALSO READ: Taking Photography into the Virtual World of Video Games


2. Setting & scratches

Always put yourself within the shoes of the customer when photographing your guitar and consider what you’d want to determine. Chances are high that, you’d desire a clear shot of the guitar with an uncluttered background. Alexander shares this opinion: “It’s best to photograph your guitar in a very neutral way, in order that the environment doesn’t distract from the guitar, and its features, damages, and dents may be properly identified. It’s important that the client actually knows what he’s getting.”

To make sure the setting isn’t too distracting, you’ll be able to use what you have already got – a wooden floor and white wall can often be enough. Using sheets or cloths, however, usually won’t achieve the most effective result, as there are often visible folds and shadows. If you wish to require it to the following level and are willing to take a position, a white book backdrop could be a good and comparatively inexpensive option.

3. Sequence

Finally, the order during which you publish the images of your guitar is something that will impact your sales results. Per Alexander, the subsequent picture sequence should be mandatory. “Start with a full shot of the front, a full shot of the rear, then the body front, body back, neck front, neck back, headstock front and back with serial. Then photograph closeups of special characteristics like pickups, tuners, and switches, still as blemishes or damages.” Pick a canopy photo that shows the complete guitar upfront, and you’re prepared.

When it involves quantity, Alexander assures us there are seldom too many pictures. “Make as many photographs as possible. Start with wide shots during which the full guitar is visible fully and so march on on the small print to showcase the guitar’s features.” In response to the question of which features are especially critical to the spotlight, Alexander says “All of them. Soundhole with the label (for acoustics), bridge, pickups, tuners, headstocks, serial numbers–you name it.”


Taking Photography into the Virtual World of Video Games

Playing video games


Photography is everywhere.

We are allowed to carry powerful cameras literally in our pockets, at any time, anywhere, with the increase of mobile devices. It’s hard to recall the time when taking a photograph was limited to special occasions, because equipment, films, and development were so expensive. Our parents took pictures yet, but fewer far and away, and only on special occasions: pictures of holiday sights, birthday celebrations, landmarks, special moments. Now, we take pictures of ordinary things, funny things, shopping lists, clouds, everyday occurrences, because, with the benefit and cheapness of photography, our motives have changed.

The grand vistas, the momentous occasions, the triumphs, and memorable achievements, we still immortalize the special moments in our lives. And these moments have also drifted into the virtual spaces we inhabit, like many other things.

Leo Sang’s Deus Ex: HR

Games like Genshin Impact are spaces of experience the maximum amount as entertainment. As it finds ample opportunity for snapshots in these virtual spaces, it shouldn’t surprise us that the photographic gaze, that eye for composition and purely visual aesthetic. In fact, it’s surprising that in-game photography – for purely aesthetical reasons as opposition documenting victories or snapping a pic of a formidable vista to be used as a desktop wallpaper – continues to be as unexplored a rustic because it still seems to be.

Those who have begun to travel to these gaming spaces to look for pictures are a few game photographers. With Duncan Harris of deadendthrills as the best-known and most generally publicized of those pioneers. Like movie stills, his work is increasingly professionally utilized by game companies to push their products, and the land games journalist compares his ultra-stylish, high-gloss pictures of games tweaked to seem their easiest to still photography in movie production. Recently, Harris was even given an advanced build of Dishonored, Arkane’s upcoming steampunk-thriller, to fuel anticipation and supply an advanced glimpse into the game’s stunning visual world.

James Pollock’s Skyrim

Harris’s professional game photography is breathtaking in its title, but he’s not the sole photographer with a keen eye for “videogame tourism” and therefore the convergence of virtual spaces and photography. Collecting his in-game photography on his blog Virtual Geographic is James Pollock, a graphic design student in Bath, England. He says he was originally inspired by deadendthrills, but ultimately opted for a totally different approach: rather than emulating Harris’s high-end, tweaked-up high-gloss technique, he took a comparably low-tech route and began to require pictures of his TV-set along with his iPod, using Instagram and Hipstamatic for added effect – a creative workaround to most consoles’ restricted – or non-existent – screenshot-capabilities.

Evoking memories of Anselm Adams and also the classics of nature photography are his black and white pictures of Skyrim’s majestic nature and Red Dead Redemption’s deserts while showing that photorealistic graphics aren’t prerequisites for impressive pictures by his Polaroid-framed images of the blocky worlds of Minecraft and set Radio Future.


ALSO READ: Video Game Photography: A New Genre in Still Image Art?


James Pollock’s lot Radio Future

Pollock sees no difference to “real life photography” while related projects by Robert Overweg, Kent Sheely, and John Paul Bichard are grounded within the context of experimental media art.

Iain Andrews’ Rage

Three-dimensional playing grounds are wholly man-made and constructed like urban spaces and architecture, game environments, especially those in open-world games with freely explorable. It’s not surprising that what may be a favorite theme of in-game photographers is architecture, especially an architecture unbound by reality’s constraints. The photographs of Australian gamer Iain Andrews, collected on Steam Postcards, think about the small print of those environments, the rear alleys, corners, and decor of those virtual spaces made for navigating through them.

Josh Taylor’s Mass Effect

There’s also another opportunity to juxtapose reality and games, but photographing the unreal, sprawling architectures of gaming’s SF and Fantasy worlds could be a challenge: Sao Paulo-based photographer and graphic designer Leonardo Sang’s “virtual reality photography” project use games as a platform for what he calls “everyday photography”, and his pictures of Max Payne 3’s city have their place beside his world photography of his city. By his realization that any open-world game offered the identical opportunity for photography because of the globe, Sang’s interest in in-game photography was piqued by GTA IV’s virtual cellphone camera, another in-game toy in Rockstar Games’ open-world sandbox.

Leonardo Sang’s Max Payne 3

In Leonardo’s case, what led him to in-game-photography was a virtual item, a virtual mobile device with a virtual camera, which seems ironic. As in the real world, it’s these ubiquitous mobile devices that brought photography to everyone’s pocket and to be witnessed on Instagram, Flickr and millions of Tumblr-Blogs began today’s deluge of real everyday photography.

With constantly increasing photorealism and therefore the popularity of open-world games, more and more photographers will search for inspiration and film opportunities in virtual worlds, the art of in-game-photography continues to be in its infancy, but it seems obvious. Games are places still as entertainment; and on balance, as Elliott Erwitt’s quote at the start reminded us: Photography has little to try to do with the items we see, and everything to try to do with the way we see them.


Video Game Photography: A New Genre in Still Image Art?

PS4 Controller


What is computer game photography about? This is often the question that we’ll tackle during this article. But first things first. Photography may be a visual variety during which the artist uses technology to capture light. The resulting piece of art may be a picture that may be printed or digitally stored and shared. Because, during this time and age, it’s also clear that this could be finished digital devices. It’s also clear that digital art, artworks created entirely or by part on computers, are a real and valid type of art and no lesser variety of this practice.

Now we are able to check on the opposite angle of the matter. Video games allow us to immerse ourselves in virtual worlds. Certainly, many games, provide gamers with a narrative to follow, but an increasing number of games allow us to freely enjoy the wonder that game developers have worked on for years. Wouldn’t it’s a waste to not stop your play once in a while and just study these environments that are artworks on their own? Virtual photography might be going down in VR, but this can be currently not a standard practice. Wikipedia currently refers to the present practice as “in-game photography” which isn’t wrong but not the language among the community.

When you’re walking through nature and seeing something that captures your attention, something beautiful you would like to capture and store or share with others, it’s common for people to require a photograph with their smartphone, or camera if they brought one. Some gamers take it a step further in video games and follow an analogous practice within the virtual world. The player appealingly arranges the viewport and captures this visual with all its contents as a still image. It gets saved digitally in a similar fashion and becomes a file that may be stored, edited, or shared, rather like photos taken by cameras.


ALSO READ: Photography For Media And Its Historical Development


The rise of a trend

Over the years, game developers would support this movement because it equally supports their own efforts in marketing the sport to new players and improving community engagement. Game development studios introduced photo-modes into their games, which allowed the game photographers to be even more creative by using camera controls, lighting changes, filters, and more options to govern the possible outcomes of an image.

Hardware and platform companies supported the movement by introducing easy ways of sharing “screenshots,” like shortcuts or on software or perhaps physical buttons on console controllers. The Xbox Series X controller includes a new “Share” button right within the middle, while the Sony PlayStation 5 controller features a new “Create” button, positioned slightly to the left. This can be a completely unique and extremely integrated way of directly sharing the artworks, whether it’s pictures or video clips, directly with the gamer’s audience on the platform and, if they require, their connected social media accounts.


Photography And Towing: Best Tips On Doing Car Photography


If you have a cool car, it’s time to take some awesome pictures of it! You can go to a cool spot and use your phone to capture the moment. Car photography is a really fun experience that everyone should try. Capture cool memories and make your ride stand out through your love for cars!


Why Should Car Photographers Have Easy Access To Towing Services


Car photographers may find themselves in need of towing services for various reasons, despite their focus on capturing the sleek and dynamic aspects of automobiles. During on-location photo shoots, unforeseen mechanical issues or unexpected breakdowns can occur, leaving the photographer stranded with their valuable camera equipment. In such situations, a reliable towing service becomes essential to quickly and safely transport the vehicle to a repair shop, ensuring minimal disruption to the photo shoot schedule.

Additionally, photographers often work with vintage or classic cars that may be more prone to mechanical issues, making the availability of a dependable towing service crucial for preserving both the vehicle’s integrity and the photographer’s professional commitments. In the fast-paced world of car photography, having access to a trusted towing service ensures that photographers can focus on capturing stunning images without being bogged down by unexpected transportation challenges.

In case your car gets stuck in the middle of the road due to broken car parts or a clogged fuel filter, you can contact Towing San Jose to get help. Listed below are some tips to achieve extraordinary car photographs.


Three Photography Rules That Every Photographer Should Know


Whether you’re a seasoned pro or just starting, these rules serve as the compass guiding your creative endeavors, promising to elevate your photography to new heights. Let’s delve into the core principles that shape captivating images and transform the way you view and capture the world through your lens.


Automobile Photography Rule #1: Chase the sun


The principle of golden-hour shooting is enormously significant. The hour after sunrise and the one before sunset provide the ideal lighting for photographs; the low-angle sun adds warmth and feel to the picture, and also the generally-dimmer light letting you balance the picture components more readily. But do not pack it once the sun goes.

Additionally, keep in mind that in the event you need foreground and background evenly sharp, then bump up the aperture f-stop to greater values between, say, f/14 into f/20 while correcting the exposure to compensate for the dark picture.

Try to maintain the ISO as low as possible, to decrease the total amount of grain from the last picture. The very best method to do that’s to use longer exposures, which you may do in situations such as this even only a couple of seconds if you’ve got a tripod.


Automobile Photography Rule #2: Surprise individuals


Occasionally a guide, the straight-down-the-middle shot may be unbelievably impactful, particularly once you do something publication with the circumstance. This Mercedes-Benz CLS-Class was taken in Beverly Hills throughout the holiday year –hence the excess lighting. It took about 20 laps around the block to get it, but it had been enjoyable and a sudden approach to feature the surroundings that I took it in.


Automobile Photography Rule #3: Rope on your buddies


Shooting car-to-car is a joy but use common sense. Do not take action on public streets –parks could be good for things like that –and do not roll around the rear of an SUV. If you do not have a suitable harness setup, simply shoot from the rear seat of a hatchback with the back lid available.

Automobile Photography Rule #4: Do not hit them on the head


It does not need to be completely about the vehicle. In reality, sometimes the very gorgeous images emerge once you dial the car’s existence in a picture. Allow the environment to direct you to the very best shot, just keep in mind it might not be exactly what you expect.


Food Videography Tips

Now we’re delving into a new place – meals videography with Russell van Kraayenberg the gifted baker and writer behind Chasing Delicious who’s here to discuss his knowledge about the best way best to take a food movie.

Food videography isn’t unlike photographing food. The odds are you can use your DSLR to perform both. And while a few of the main choices you make won’t involve the camera narrative, components, food styling, light are as crucial in a food movie since they are in food photography — the more gear you use, and how you use it can have a huge impact on the last video. If you are one of those who love watching videos, click here to Convert Youtube video to mp4 and download you easier access.

Did you know? Video is based on deception. When still pictures are played in fast succession quickly enough our eyes have been duped into believing we’re seeing natural motion.

Food Videography vs. Food Photography

Exactly like in food photography, you want to focus on light, composition, framing, color, texture, lines, shapes, props, styling, not to mention the food. That is where the similarities end though. There are 3 innovative aspects unique to videography: motion and activity, the passing of time, along the music.

Movement or Action

Think about steam rising out of a dish, or bubbles in a boiling liquid. There are natural motion and activity around us in meals which produce food videos stand besides photography. Also take into consideration the actions we experience when we bake or cook, such as mixing. Even though a stand mixer whisking out can be amazing, it does not have the same impact for a mother directing her daughter’s hand at mixing with cookie dough. Try to tell a story together with all the motion and activity inherent in cooking and food.

Time

Whether played at the normal rate, sped up, or slowed down, time plays a massive role in the visual allure of a movie. Editing also plays a huge part in how time is perceived. Nobody will need to see dough rise for 2 hours but squeezing those 2 hours to 90 minutes of time-lapse footage can be quite enjoyable. Time does not need to be sped up or slowed down to make a movie intriguing. Many real-time processes from the kitchen could be interesting to observe.

Music

While action and time can be hauled into a photograph, it’s all but impossible to communicate any kind of audio in a photograph. Whether the audio is in the own kitchen, a narration, or even a tune dropped in, the sound is going to have a huge area of the movie and will make or break a story. The sound can frequently tell us over the visuals – believe sizzling vegetables in a frying pan, a tea kettle a useful kitchen timer going off.


Shooting

There are two significant differences between shooting video and shooting photographs. To begin with, Shooting a movie on DSLRs necessitates shooting in the full manual – which includes manual attention. (There isn’t any way around this as any attribute left on an automobile is likely to make changes as you shoot. These changes are extremely noticeable rather than seem great

Transition

There are various alterations out there. When it’s a direct cut, fade, dissolve, wipe, rotate, or particular impact, you have plenty of choices available. To prevent any type of specific transition and actually, 95 percent are direct.

Uploading

Uploading is simple. In reality, the majority of editing programs will probably do it for you – sending it directly to YouTube or even Vimeo. Uploading your footage in the maximum grade available. Upload the movie in full HD. DSLRs create beautiful videos. Why don’t you share that?

A Photographer’s Journey with Construction Workers

Construction Workers


I do the majority of my company activity with owners, public agencies, and private contractors for construction progress pictures, time-lapse movies, group pictures, and video interviews.

The person or small group structure employee portraits such as the one above aren’t in my contracts. I really do them willingly. I have a gallery of merely every construction employee portraits. Some while using equipment, sometimes using drills (check here to get Makita drill with battery), or when planning.

The Reason

1) Building employees belong to an exceptional tribe, one that is intriguing to translate through photography. Building employees make me feel in your home, they are friendly, curious about everything I do, have a feeling of humor, and largely eager to present. Additionally, the construct things, and that I construct photos. We’re simpatico.

2) The semester has been high power and really at the moment.

3) Short length, a photographic sprint for those who may. Sessions last from 30 minutes to two hours.

4) Interest levels are large and either side of the camera, so we’ve got fun with the procedure.

5) The battle of wild light and color compels me to go on intuition and expertise. That is high for me personally.

6) I expect to translate and respect those fascinating and generally happy characters. What they do will be difficult, dangerous, and dirty. What greater way to honor them?

7) On following site visits, even when I am known for the job, I receive my fist lumps. Great!

8) Seeing how I could create the pictures later is an exciting process for me personally.

ALSO READ: Why Drone Photography Changes Roof Inspections

Due to the speed and pressures of a building site along with the lurking dangers almost anywhere, I decrease the time that it takes to do those portraits. Therefore, I do not utilize any supplemental light, I use what is there. My ability is to set up the topics into the appropriate relationship with sunlight or anything artificial lighting been set on the website. But that is the beauty of understanding what you are doing. Using today’s technology, an expert photographer can take at will with the knowledge that through the edit stage, colors, contrasts, and nuance may be handled to good effect. It is the only means to create this specialized excellent degree.

But do not need to get overly hung up about the technical. While obviously, it is critical, the true skill comes from understanding how to evoke responses from individuals that are usually not photographed at work within this formal manner. Building workers take a lot of selfies but I am performing a greater degree of the result due to my attention, technical abilities, and accurate desire to honor those fellow tribe members using their very own personalized construction employee portrait.

Occasionally these pictures wind up in business newsletters that reveal these folks and they love watching themselves looking good!

The Group Portrait

The team portrait is always enjoyable since it requires a little performance art on my part. However, I do not mind. You must get everyone to buy into the notion. This is not a problem since they are being respected. But about 5 percent are on the bashful side which they would like to remain in the fashion back. That is ok, you cant’ catch everybody. And the 10 percent in each group which are fully cooked hams offer the counter.


The Art of Video Game Photography

Playing PS4 game

Since the dawn of the video game era, intriguing game worlds, and every year more realistic and detailed. Additionally, you captivate and make moments. Due to tools that are different, it’s currently possible for us, these distinctive encounters by screenshots catch. This new media art trend, known as the virtual photographer (VP), and I am your host, fully.

For the very first time, photographically captured screenshots in the simulation game Second Life. Here were exhibited from avatars at gallery photos, of those games. In might 2016, when Nvidia has expanded at the screenshot-style trend. Utilizing Ansel, it’s likely to shoot pictures and in post-processing your functions to edit. However, now the is not pc players, with included style, since names seem, or this can be downstream. There is a prominent case in point the games are a thrust has overlooked, the, was horizon zero dawn. And springing pictures of this protagonist up like mushrooms!

Animals have done it to me, and I believe that an animal companion could be a fantastic match for Aloy.

Have a shot

Fundamentally, it’s comparable to actual life. You see something exquisite and believe, that get on with it, and could be a cute background for the smartphone or your pc. Personally, it had been playing with the DLC of the witcher 3, like I’ve begun to create screenshots. In principle, it’s very important to differentiate between screenshots that are simple and photographs — a photo of a cutscene, isn’t a picture! In photography, you will need to have control over the camera, and that’s between the strings, at least consoles — sadly not feasible. My photograph mode experiences I had while enjoying with horizon zero dawn. I was somewhat helpless, due to the mode provides configurations: of body presents, which blur and may choose the protagonist Aloy, into the coloring, to filters. My highlight: day change’s time, to acquire the lighting. And as a result of the open world that is diverse, and the world is infinite.

Gaming links

Virtual photography is a trend that continues to grow. On different websites, for example, Instagram or Twitter, be posted thousands of images. Players discuss moments and their experiences. Games can be seen by you, by searching at photos of the others, using an entirely fresh angle. Are picture modes from Ubisoft and the most recent god of spiderman-titles or warfare have been a tool to the production of a screenshot of this kind. And the best part is that this kind is being supported by the studios of artwork or perhaps exhibitions. Sony admits to the subjects, about its PlayStation blog page weekly. Video games such as trips, where I have time to invest, and also imaginative can dwell.

Ultimately, I want to introduce you to a few virtual photographers via many different game worlds to journey along with your own experiences!

Also Read: How To Take A Good Portrait Photo

@rosapexa

“My love for your digital photography started very arbitrarily and unspectacular. The dawn played as I at the moment, horizon zero, I was overrun, to get several opportunities for pictures from the ground and was curious about just what the manner electricity. And from that point on, I took advantage of every time that I watched something beautiful. So, all felt.

Once I chose to share my photographs in social networking, I was amazed and thankful that a good deal of different men and women share the identical enthusiasm for gambling, and with this kind of photography. The god of warfare photograph contest with this picture means the world to me today, so much. Because although I enjoy my pictures I’d have never believed that you’re good enough to have the interest of a game’s developers.

Virtual photography has become so much part of my life, the way to use the movement keys and through them, I will share my enthusiasm for games. Topic and my motivation are portraits. Assassin’s creed odyssey’s Alexius. My love with this game and, particularly, with this personality has helped me better. I’ve discovered my place of refuge. And we each need to. My photos will be to express just how much he means to me personally my manner. I’d love to discuss everything that makes me happy. Regardless of what folks think.”

@lanamelodii

“My VP-journey started a couple of years ago, once I began, the elder scrolls v: Skyrim to perform with. To start with, I have done kindly easiest screenshots of what I saw, but once I’d done this for a little while I started to things to pay attention. I use the Skyrim-community on Instagram, therefore I began to post my photographs there and discovered lots of people to found about this time with as you can imagine, I discovered that photography is a thing, and that got me inspired also to find out new things and to begin. And here we are!
To produce close-to-nature shots, the, what I like best will be unquestionable. I have the sensation that my imagination is best when I areas you can explore, and run in the sports universe around.

The article in this photo was a crash, but once I watched that the bull facing such a tree, then I knew precisely what I needed the effluent of the tree, like the antlers of this bull look. It functioned, although before I get everything, it took me some time. I edited the picture somewhat, and voila! That this hobby is something it’s certainly the significance of patience, when has taught me!”

@virtual. Adventurer

Digital photography is a passion of mine. Once I’d studied four years from pictures in life, it felt to me to maneuver from the VP, and that I started to feel this jaded. And then I found that photography; I could go anywhere in the world. And not just this planet but the fictional! The play is also, for me, an escape from reality, an escape, along with the digital photography is a valve which allows me to catch, by way of even the portrait of a personality, a picture recording, or instance.

The recording, which I would like to reveal is sam drake from uncharted 4: a thief’s end. I will make the most of each chance since he’s got a special spot within my heart to share sam with the planet, and I like to picture him. I attempt to catch; such as the expressions if I picture him.

Since you can probably consider, sam is my favorite topic to photograph! But portraits of my favorite have been in the general subject — I love to make evocative stunning or romantic portraits of individuals. They’re just contained, if I see a bit of scenery, even while portraits are to get me something private, although I try to place myself at the landscapes.

@firescorpio_photo

“First of all, digital photography was a way for me to allow me to feel better since I went through a critical depression and discovered little to no pleasure in what I did. I then found the photograph style in assassin’s creed origins, after which I picture design & film as a most important topic had researched, and one of my main obsessions in life picture posters were, where I, both as a hobby in addition to professionally worked, I started my trip.

At a certain stage during my digital photography excursion, I chose to go for a complete portrait and started to turn everything in like it ought to be used to get a poster. Why the hell not really at the poster turn and I said to myself? And because I began with the editing!

Overall it was a superb journey, filled with ups and downs, and has taught me much about myself and that I not only helped them to develop as an individual but to improve my abilities.”

And just like the other games mentioned above, Roblox is one of the virtual world games you can be creative and shoot photos. Check out Jeux roblox generateur en ligne to learn more about tips on how to become a master of the Roblox world.

Fish Photography: How to Take Photos of Cichlids

Photo of Butterfly Cichlid

Once you begin spending your time filming to your glass container through your camera you get several reactions. My photographer-friends laugh at me, I am being nagged by my children and my wife sighs and shakes her head. Like that they had more understanding in my previous endeavors for some reason, it sounds

Sure, these fish are fine is it, but exiting to examine fish-photography?

It is leaving with bass images. More leaving when it involves your fish to make them. The interaction that happens between our cichlids and the remaining inhabitants of our apartment has always fascinated me. Most of our cichlids have connections. My wife is dull, my son is reckless, the food is brought by me and my kid is benign. 1 day I will attempt to picture the way she squeezes her face to the glass and defeats it with her small hands and a complete bunch of inquisitive tropheus awakens before her nose to test out her. If I’d do something such as that themselves would be pressed by the group.

Cichlids posing

Returning to the field of photography I must state that shooting cichlids from Africa which you “understand” is quite awarding. It appears like they’re posing for you, moving forth and back, till you’ve gotten the shots spreading their fins you’ve got. When you face new cichlids, it’s more frequent that they shy away from your odd unnatural behavior it’s having an individual after their movements at them with a significant thing. Because they tend to maintain their stock in peace as far as 25, the place to take cichlids is at breeders. This restricts their experience of getting people close that it could not be possible to find any decent shots of these. For reasons are this obviously gets more bothersome because these forecasts. Color and their position are brought out into an intense amount every time a man must hang out with a set of five to six females by himself. Plus, it does not actually make it worse that these men already from the beginning are chosen for having this little “extra” piece of elegancy for their own bodies.

In stores it is different. There it’s more likely to encounter intrepid people, however the fish tend to be trapping their tanks, also, generally, they aren’t showing the smallest of the true colors.

Pictures can’t be taken by cameras

An important detail I was taught by my grandfather and dad (both photographers because a very early age) is it is not cameras which take pictures, it’s photographers. This is most likely quite best to remember especially now when technology manages nearly half what was ones that my grandfather’s real craft. It is great with this advancement of technologies since the less time spent on the technical portion of photography that the longer you spend on producing images which is exactly what it is all about. Would be my encounters in aquarium photography’s decisions and you need to bear in mind I have gone the manner. I haven’t even tried to use a digital camera, auto focus or built-in flash or another sort of automatic work just because I really don’t know how to and have not used it in my everyday job as a photographer. This doesn’t mean it’s wrong to use such purposes, but I expect that several the things I’ll be talking can be of aid also to people who opt to utilize more automatic/modern gear.

Light

Photography generally is about mild. The angle where the light strikes on a cichlid determent, we encounter color, its shape, fins and eyes. You get a manifestation in the glass if a person chooses to use the flash of the camera. That this reflection winds up in the middle of this picture, if you tip your lens. In the event the built-in flash is situated high in your own camera you point the lens at an angle you occasionally avoid reflections, however the form of the fish gets dull and flat.

The “right” way to put the lights to get aquarium photography would be from above. We experience the body of a fish how and this generates highlights on the rear of the lowlights and fish under we’re utilized to view it. I enjoy braking principles and would love to point out that why we’re taught the “above lighting” equals “right” lighting is this is the way we generally se fishes. From above all light comes from the lake/ocean and this is also. It’s strongly recommended to put the light from above to begin with but most of you that have seen underwater documentaries in discovery or even BBC have likely noticed that because of the place of the camera that the light can come out of whatever angle and if lighting surprises us that is when we get a really fantastic kick from underwater photography. Before we’ve discovered to paint a portrait, but we should not begin with cubism? (but if that is what you would like to go ahead and act.)

Fixed flash or lights?

Perhaps we ought to say something about lighting that is mended, lamps, to put it differently. In my opinion it’s best to utilize as slow a movie as possible in all kinds of macro photography because it’s the details which makes the images interesting. Its equivalence that is electronic or 100 ASA is based on me the movie for this kind of work. As you want a shutter speed of 125th of a second to suspend a moving fish many lamps aren’t strong enough, particularly those situated in regular aquaria lighting. I am not stating that fantastic photographs were not shot with lighting that is. It’s a bit like feeding bloodworm into tropheus. It could work but it may wind up in a disaster. There’s one thing to consider should you chance to be the owner of a pair of lights that are strong. The lighting that is unnatural stresses the bass. Not too much because they dislike the light but since they see everything inside the room away from the tank from a standpoint that is different. To bright suns that are large that are new with stands and a whole lot if threatening items and shapes. It takes some time to have accustomed to this. I can guarantee you that I’ve attempted. Among the reasons is because there’s one benefit in using lighting. It is possible to see exactly what the light will look like once you look through the viewfinder. Till you find the results you won’t understand this. This means until you receive the light how you need 18, it may take a couple of sessions.

With all the flash, this advantage with all the lights would be to be compared to a massive number of benefits. In using them, the advantage is that the bass doesn’t notice them. The flash bulb lights up and melts until the eye of the fish responds to it. In some rare occasions I’ve noticed responses from the bass, but I believe this was times when I’ve connected several flashes using a protracted flash blow for an outcome.

To have the ability to shoot bass “my way” you need a camera, preferably one having a varying lens along with a socket to get an external flash. Pretty cameras using lenses that are varying features several compact cameras and socket. Then flashes three of these are needed by you. At in or flee markets advertisements you can find flashes at a low cost. Or you could have one. The one thing that’s significant is that you can hook them up to a camera using a cable and they flash whenever they get a signal from the camera. It is not important if a number of those buttons or buttons appear to be out of sequence, the potency of the flash can be determined by altering the distance between object and flash. You hook up among those flashes to your own camera using a cable and purchase a little sensor to attach to another two which make them flash whenever they feel the other flash going off. You’ve turned these 2 flashes to what photographers call “slaves”. The cable will cost you the detector about 15. I’ve discovered several flashes of brands and all sorts in advertisements for under 10 bucks and in markets. An alternate for this is currently purchasing slave-flashes that are new with built-in sensors. The decoration of the ones that are smaller vary between 35-60 dollars.

What about the vulnerability values? Should you use negative color picture of 100 ASA, that is exactly what I advocate, you will not receive a lengthy depth of field with gear, but it’s enough, I believe. I don’t really feel the more depth of field you may find the better. Just make sure you concentrate the fish’s attention and you’ll be ok. Should you ask me I believe you could intensify a bass portrait by allowing the protracted body of this fish be out of focus.

It’s obviously an advantage when you’ve got a flash meter, so you can quantify the specific strength of these flashes, but it isn’t vital. Choose the exposure time. It may be marked in your own camera as a x, or it might be among the exposure times. Utilize f-stop 4.0 using a 50-millimeter lens and you’ll be ok. That you must step with a flash meter or attempt a few occasions to get it correctly, you should like to use another ASA or a shorter/longer lens. If you put the flashes in a distance across the surface and they’re not of professional power, then place your mind to 2.8. Color negatives are tolerant over or under exposure is paid during printing or scanning your pictures.

Also Read: How To Take A Good Portrait Photo

What type of camera?

I recommend one with manual. As soon as your goal fish has its fin beams and you encounter situations should you take details auto focus is slow along with your camera is currently focusing on a foliage on the side. The auto focus tends to get confused with the proportions which might happen on an item seen in near selection through water. Most of the auto concentrated lenses I have tried have issues. It’s not necessarily you want to concentrate on a thing that’s at the middle of the picture and if your entire viewfinder if stuffed up with an item that doesn’t step over an inch and a half, you better be put on with your attention. Since you aren’t likely to concentrate that far anyway proceed manual, I’ll inform you about that later.

It’s crucial to use. It must have the ability to focus an item situated about 5 inches. It’s not a fantastic idea wide-angle is shorter than 50 mm. Are known as macro-lenses. You will find lots of lenses which have a setting but also pure macro-lenses. Normally a macro-lens has “macro” written on it, but you can obviously only look through the viewfinder and concentrate on something to tell whether the lens is competent. I operate with a 50-millimeter macro and it’s worked well. 50-millimeter lenses tend to be known as “normal” because they pretty much mimic the shapes and types of objects how we view them with our eyes. Shorter than 50 mm is more wide-angle, and more is “telephoto”. Telephoto lenses press the picture in which the fish may look fat and short.

The way to concentrate

You can put them directly should you use flashes. They must get cleaned you lose when the covers are filthy. Put the flash that’s connected to an own camera at 1 and a half an hour beside you. So, it is at an angle point it rather than pointing towards the glass surface. Do not chase around the fish. Where the photograph is to be obtained, you determine. You need to wait till your thing swims by. If you remain the bass will come close although you can make alterations. You require a fantastic deal of patience. For this reason, it’s extremely important also to be ready to sit for quite a very long moment and to sit down. I sit with the camera risen looking with both eyes across the viewfinder. I will then lower my head and look without scaring the fish with body motion when a fish has close.

That it will do you good to keep working forth and back. Concentrate on a place the create rocking moves along with your body contrary to or away from your glass to catch the attention along with a few inches behind the glass onto a place. Like many of you understand it’s common that cichlids transfer between spots within their land. If you’re supposed to take at a tank which you’ve not ever seen before it is watch the fish before you begin laying out your gear and to stop at a space. You’ve sat for a little while in front of the tank and when everything is set up, things on the other side of the glass will go back to normal.

It is sometimes a fantastic idea to grow up them a bit in case you’ve got flashes that are strong. In this circumstance you should get rid of the cover-glasses and you’ll have the disperse. Since you light a region of the tank simultaneously if you’re supposed to operate with a flash from over this is essential. With a broomstick along with a tape, a flash can be placed by you at any given angle. Should you put one flash hitting the tank additionally, it may make a result. Angles be certain you don’t point them if you experiment with all the flash. This may result being visible in the of the tank.

From camera to book

When you’ve got them developed it’s often cheap to receive your negatives. Are all the time for publishing your own photographs naturally for the internet and in magazines. Photographing cichlids is a means of examining their behavior and that I hope this guide may encourage one to take in the artwork of photography. Cameras that are very good are a benefit but bear in mind the features in becoming a cichlid photographer are cichlid patience and fire.


https://www.youtube.com/watch?v=vZgjCmtZpfw

Why Drone Photography Changes Roof Inspections

Aerial Photography of Residential Roofs

The real estate photography in Connecticut is taking a radical turn utilizing drone technologies not simply to map the terrain, but also to inspect the roofs at the building websites. Of enhancing the manner construction occurs, the actual estate techniques and methods has improved in the last couple of decades.

The conventional procedures of roof review involved a great deal of danger and security issues for those conducting it. The building business looked for an alternative. The main reason for adoption might be credited combined with being a mode of review to the security it provides. Together with drones, in ways, you do not have to rely on the security risks which have decreasing of the contractor, problems with the collapsible or machines roofs.

If you’re still unsure as to why you need to elect for drone-based reviews of the roof, then let’s provide you a few of the greatest motives.

Security is one of the biggest benefits of choosing for drone inspection. Exactly why and how? According to Roofer CT, roof inspections comprise one assess every corner to scale the roof, make your reports to. For this, you want an inspector to conduct the review. Imagine if the roof is collapsible or it’s damaged to the extent that when somebody goes to the very best, they might collapse? Who will be liable for the safety in this circumstance of the resource? With the review, it is possible to easily inspect the roof with the technologies, which will assess every inch of their roof. It’ll have the ability to access places at which the eye might or might not achieve. With technologies that is drone, in a nutshell you’ll have the ability to conduct roof tests in a method that is secure and accurate.

Contrary to the human eye which mentions and records anything it’s observed, the drone is a sophisticated system that has in-built video recorders too. You will receive videos and photos of this roof, and you’ll have the ability to find the situation as it’s with the actual estate photography. When it comes to being effective, there’s not any way you can conquer on the photography. You’ll have the ability to observe the angles which you would miss out. You’ll also have to see the precise places the drone has seen because of the in-built GPS system.

Also Read: How To Take A Good Portrait Photo

Once it comes to review, the very first thing comes to mind is that the total cost of this review. If you’d like a resource to run the 23, you must invest in funds, in other items and the equipment. With the inspection, you can avoid the additional expenses. You will cut back on the equipment price, which is needed to conduct the review. The cost is investing at the drone, which will be a one-time investment and more economical in comparison to costs.

With such fantastic benefits, it’s time that the building company stepped into drone photography for inspection and other purposes.